renault-digital-2020
Workshop 4 - Création d’un page de contenu authentifiée
Maintenant qu’on a une page login avec Workshop 3 : Création d’une page de login (ajout authentification), on peut maintenant afficher du contenu aux utilisateurs loggué !

Ajouter du contenu dans le backend
Maintenant que vous avez un backend et une base de donnée, vous pouvez aussi commencer à y ajouter du contenu. Example: ajouter une table “synthesizers” qui contient des synthetiseurs, pour pouvoir les affichers aux utilisateurs.
Vous allez devoir lier chaque entités avec l’utilisateur : cela aura pour but d’afficher à un utilisateur que son contenu, ou aux autres utilisateurs de chercher du contenu pour un utilisation en particulier.
Java / Spring Boot
- Créer une nouvelle entitée (noter la clef étrangère vers un
User)@Entity(name = "synthesizers") public class Synthesizer { @Id @GeneratedValue(strategy = GenerationType.IDENTITY) private long id; @Column private String brand; @Column private String name; @Column private String creationYear; @ManyToOne @JoinColumn(name = "created_by") private User createdBy; // ... - Créer une nouveau controlleur sous “/api/monentite”. L’utilisation du préfixe “/api” est utile pour restraindre l’accès à tous ces URLS aux utilisateurs authentifiés !
@CrossOrigin @RestController public class SynthesizersController { @Autowired private SynthesizerService synthesizerService; @RequestMapping("/api/synths") public List<SynthesizerDto> synths() { return synthesizerService.getSynthesizers().stream().map(SynthesizerDto::new).collect(Collectors.toList()); } } - Quelques points :
- La restriction des URL “/api/**” est fait dans la classe
BasicAuthConfiguration:@Override protected void configure(HttpSecurity security) throws Exception { security // disable form login security (for login) .csrf().disable() // requests URL .authorizeRequests() .antMatchers("/api/**").authenticated() // authentication type .and().httpBasic() // cors .and().cors(); } - Dans spring, le chargement des objets liés (clef étrangère) doit se faire dans un service, annoté avec
@Transactional - Vous devez créer le Dto associé
- Lorsque l’application démarre, vous pouvez ajouter quelques objets par défaut pour fin de test (nous verrons la création plus tard), par exemple:
      synthesizerRepository.save(new Synthesizer("Juno-106", "Roland", "1984", adminUser));
      synthesizerRepository.save(new Synthesizer("Synthesizer 1c/2c/3c", "Moog", "1964", adminUser));
- La restriction des URL “/api/**” est fait dans la classe
Ajouter un table dans le front (Angular)
- Créer un nouveau composant avec
ng, par exempleng generate component synth, puis dans “synth.component.ts”:import { Component, OnInit } from '@angular/core'; import {HttpClient, HttpHeaders} from "@angular/common/http"; import {Router} from "@angular/router"; @Component({ selector: 'app-synths', templateUrl: './synths.component.html', styleUrls: ['./synths.component.css'] }) export class SynthsComponent implements OnInit { synths: any; constructor(private http: HttpClient, private router: Router) { } ngOnInit(): void { this.http .get("http://127.0.0.1:8080/api/synths", SynthsComponent.getAuthenticatedHttpOptions()) .subscribe(synths => { this.synths = synths }, error => { alert(`You need to be logged in to see this page: ${error}`) }) } private static getAuthenticatedHttpOptions(): any { const token = sessionStorage.getItem('token'); console.log(token) if (token) { return { headers: new HttpHeaders({ 'Authorization': `Basic ${token}`, 'Content-Type': 'application/json' }) }; } return undefined; } } - Quelques points:
- Noter la méthode
getAuthenticatedHttpOptionsqui récupère le token en session, et l’envoi au serveur, qui l’utilisera pour valider l’utilisateur - Si vous utiliser une autre forme d’authentification que HTTP Basic Auth (par example JWT, ou Sesion), ce sera la même chose, mais sur un header différent, ou avec un cookie.
- Au retour du serveur, on met à jour l’objet
synth
- Noter la méthode
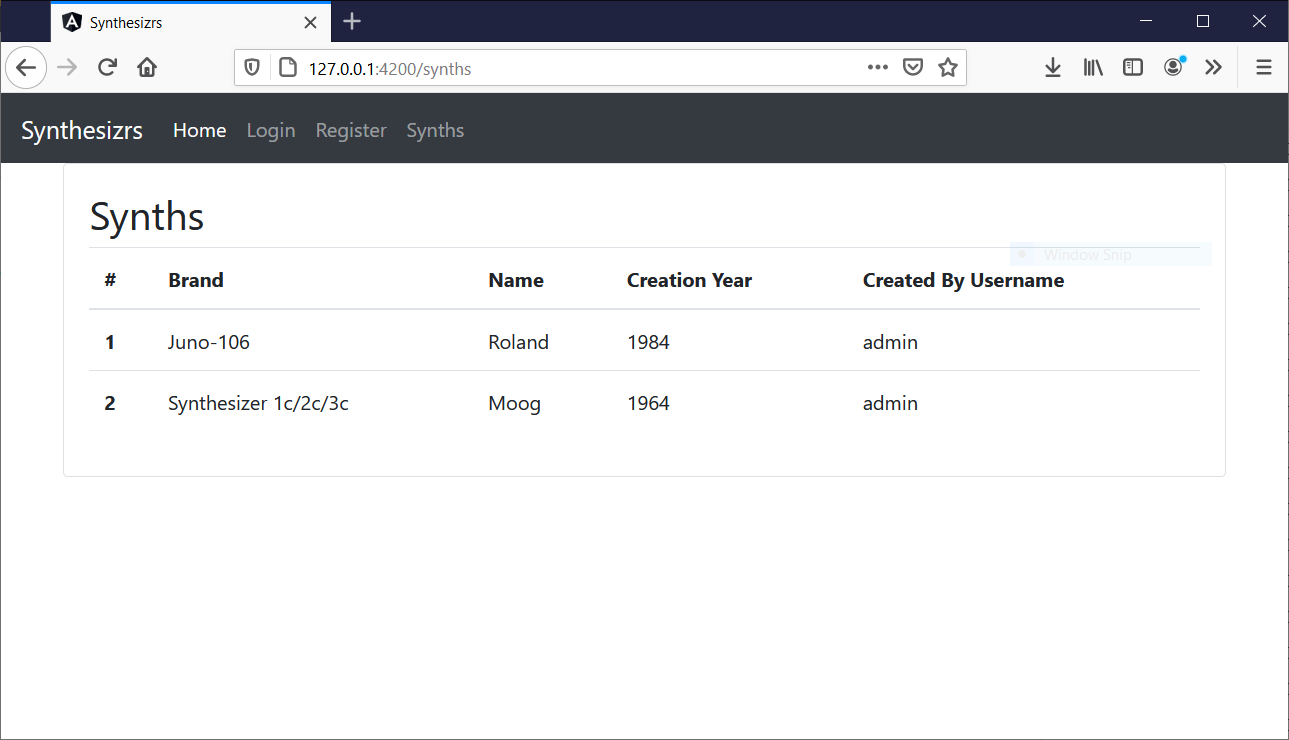
- Dans “synth.component.html”, on utilise une boucle for dans Angular pour faire un tableau Bootstrap à partir de l’objet
synth:<div class="container-md"> <div class="card"> <div class="card-body"> <h2>Synths</h2> <table class="table"> <thead> <tr> <th scope="col">#</th> <th scope="col">Brand</th> <th scope="col">Name</th> <th scope="col">Creation Year</th> <th scope="col">Created By Username</th> </tr> </thead> <tbody> <tr *ngFor="let synth of synths"> <th scope="row"></th> <td></td> <td></td> <td></td> <td></td> </tr> </tbody> </table> </div> </div> </div>
Suite
Maintenant que nous avons un tableau d’objet, nous allons créer un formulaire d’envoi avec upload d’image, voir Workshop 5 : Upload d’image.